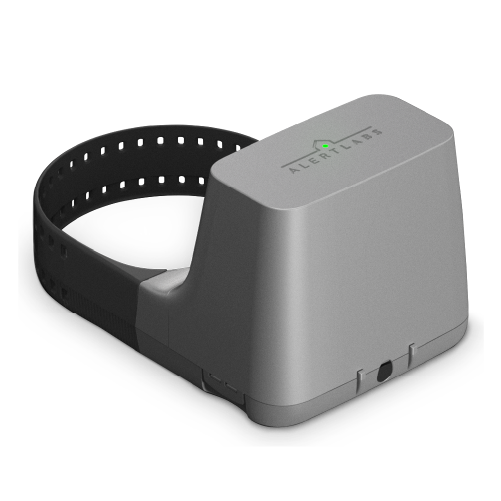
Flowie O
Water Flow Sensor

Please read important information about compatibility, accessories and calibration before installing.

Standard Install

Add sensor and see install instructions at: alertaq.com/addsensor
If you have purchased Professional Services to pre-register your sensor, skip to step 2.

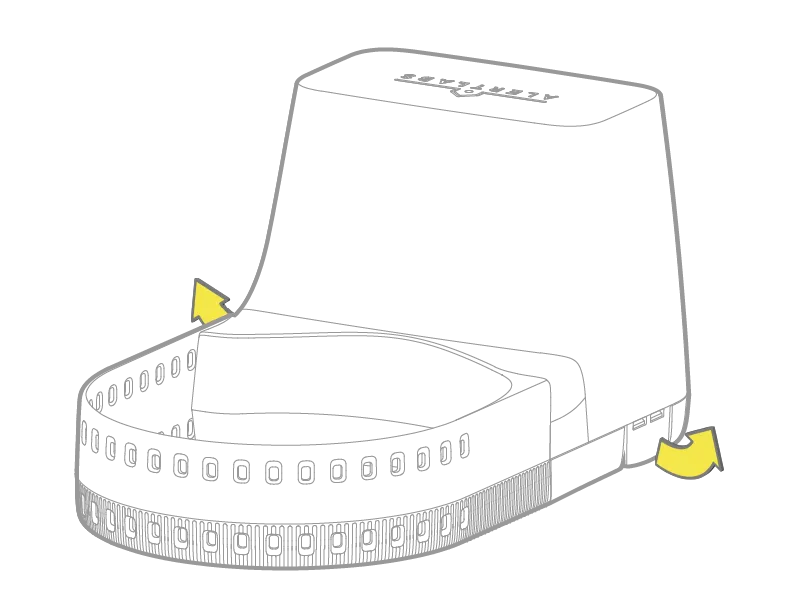
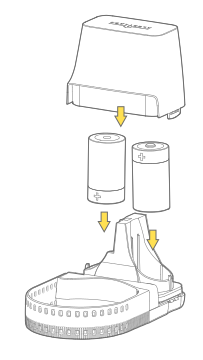
Open the Flowie O, insert the 2 D cell batteries and close the housing

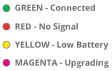
Confirm the LED is green
See troubleshooting if it is not.
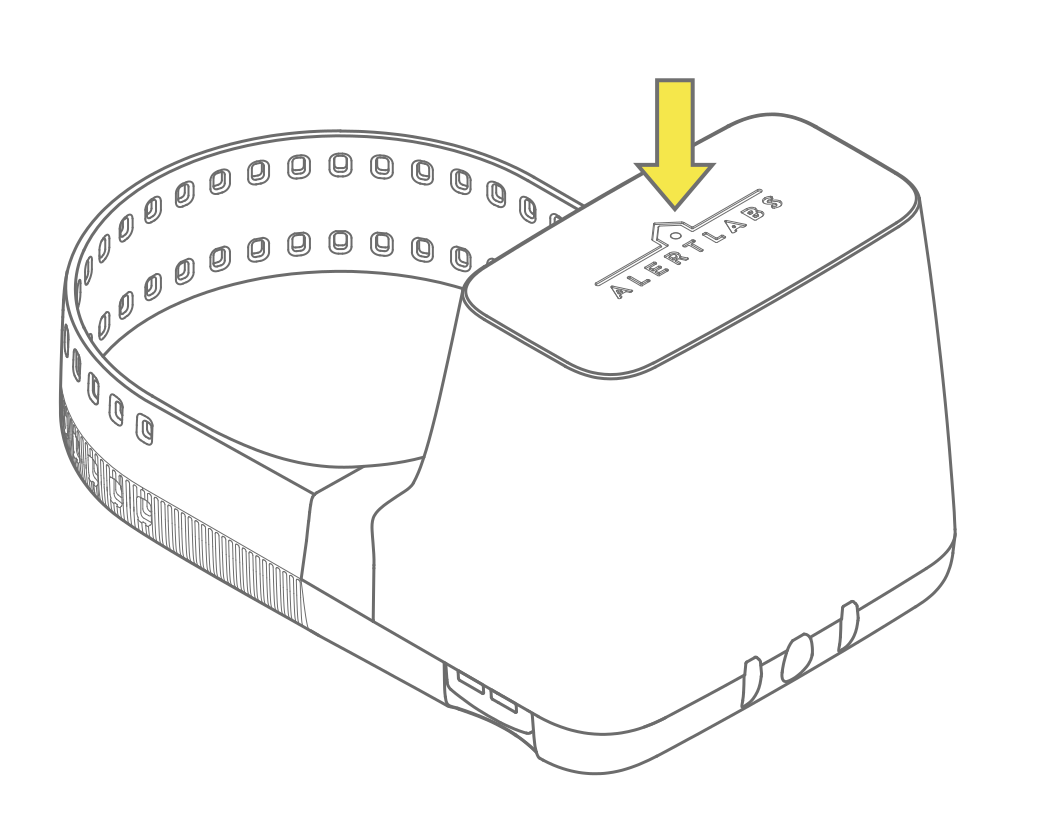

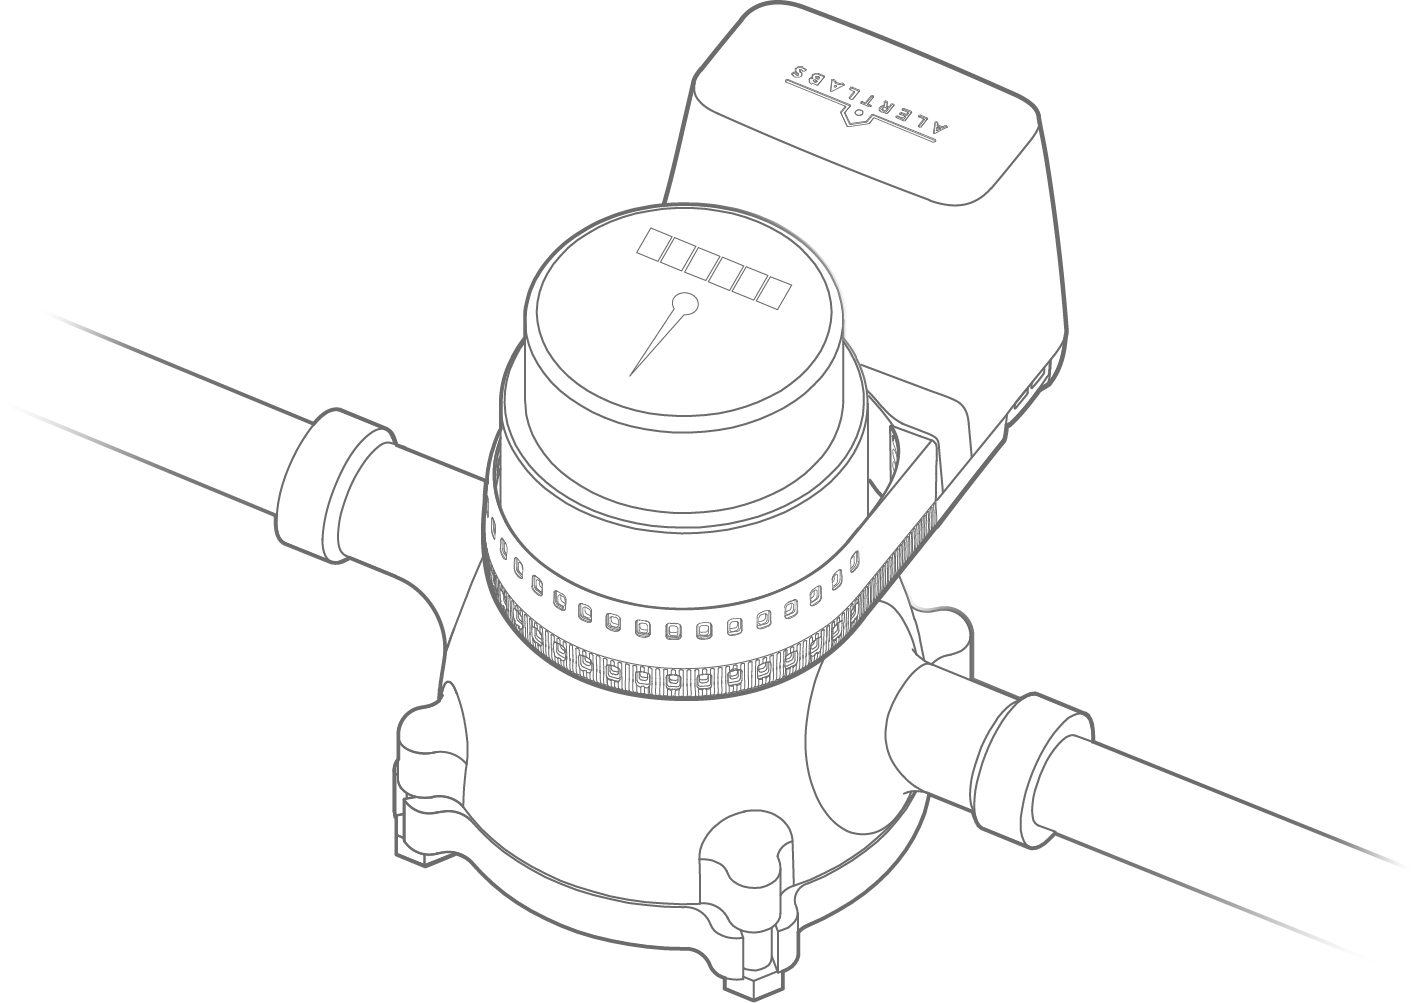
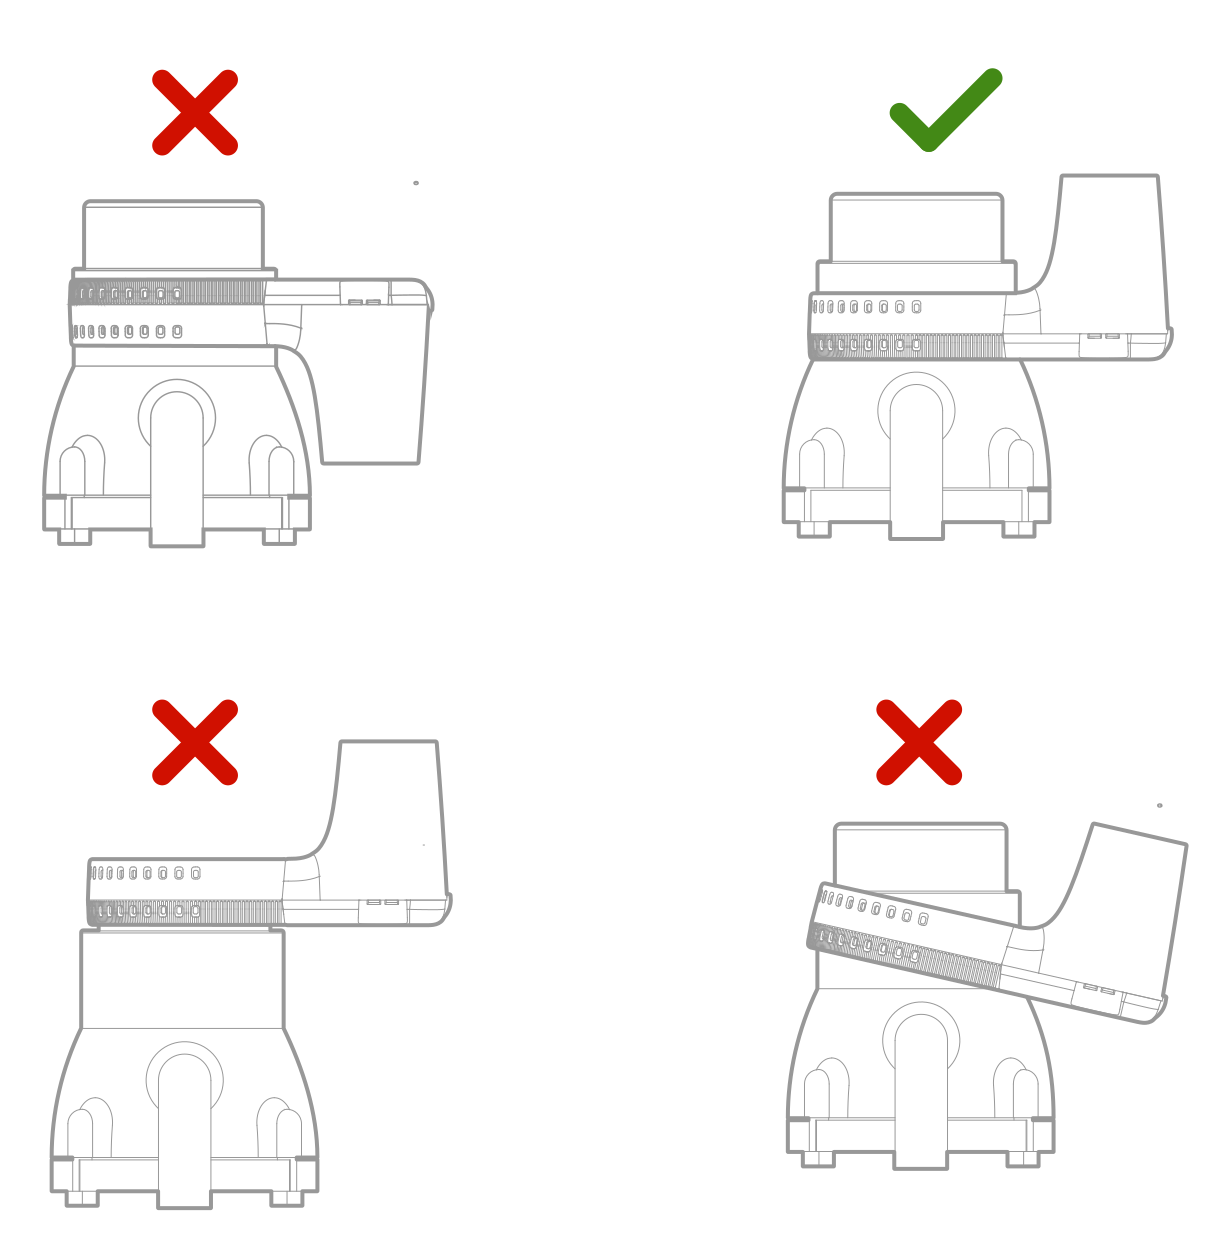
Strap onto the water meter
It should be low, snug, and centered.

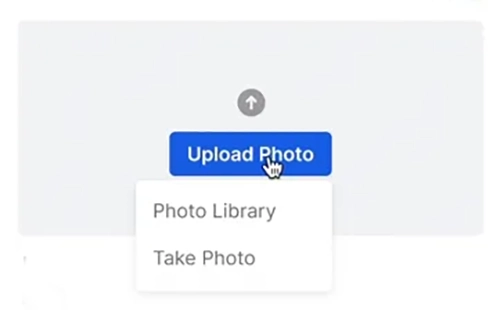
Upload a photo of the installation to the sensor details page in AlertAQ™
To get to the details section of the sensor, select the name of the sensor from the Sensors page. See help article.
If your sensors were not pre-registered, update the sensor name based on its installation.

Begin calibration of the device
In order for your Flowie O to provide accurate data, you must calibrate the device.
Visit the calibration page to learn more.

Compound Meter Install
Add sensors and see install instructions at: alertaq.com/addsensor
As compound water meters consist of two water meter heads (high and low-side), you will need 2 Flowie O water flow sensors.
If you have purchased Professional Services to pre-register your sensor, skip to step 2.
Insert the 2 D cell batteries
Lift up the flaps on either side to open and close the housing. Repeat for each Flowie O.
Confirm both LEDs are green
See troubleshooting if it is not.
Strap onto the water meter heads
They should be low, snug, centered, and angled as far apart as possible to limit interference.
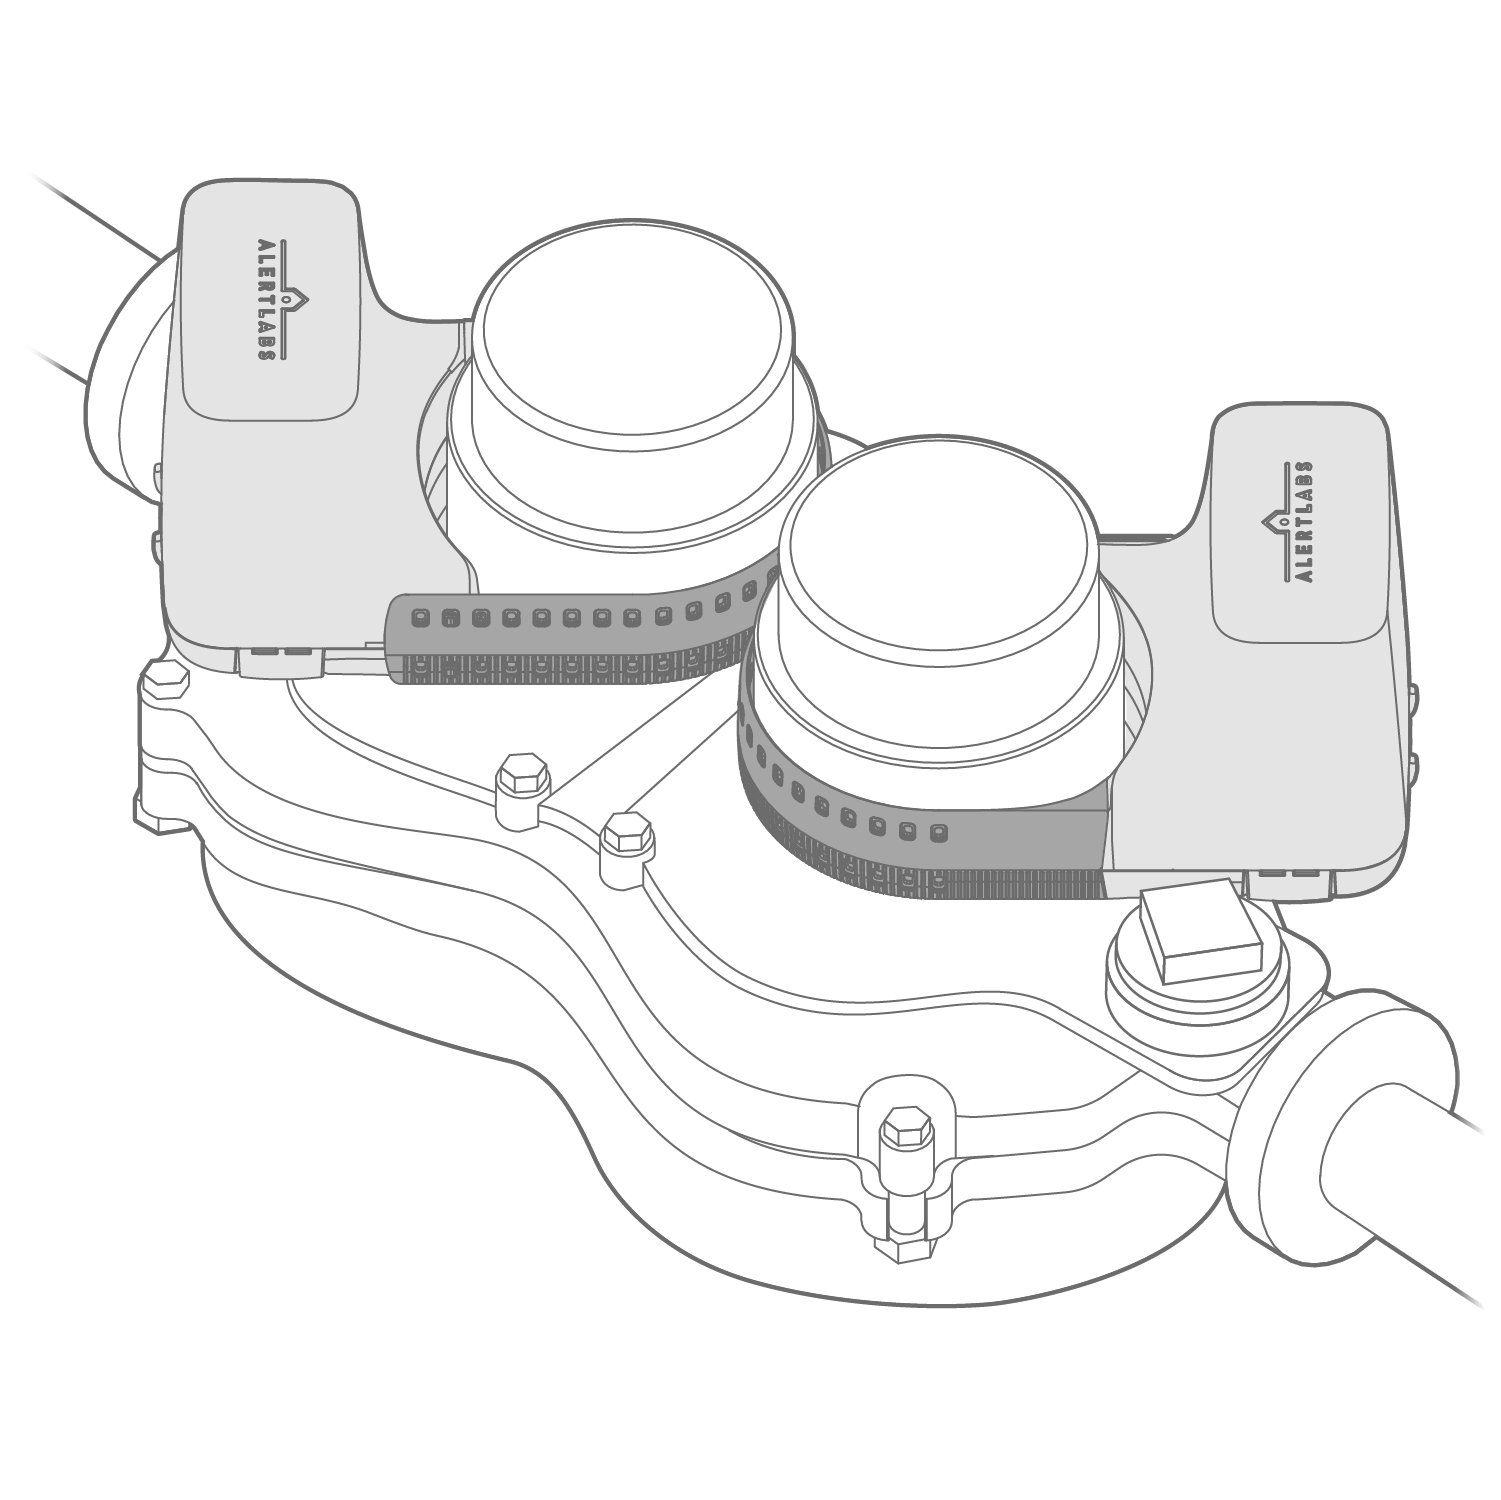
Upload a photo of the installation to the sensor details page in AlertAQ™
To get to the details section of the sensor, select the name of the sensor from the Sensors page. See help article.
If your sensors were not pre-registered, update the sensor name based on its installation.
Pair the two Flowie Os as a compound meter set
a) On the Sensors page, select the Flowie O
b) Click Settings → Sensor Settings
c) For "Is this part of a compound meter?" select Yes
d) For "Meter Dial," select High or Low based on which register the Flowie O is strapped to (see below)
e) For "Paired with," select the other Flowie O at this building
f) Click Save
High vs. Low Side:
Each register has a number on it indicating its pipe diameter. The register with the larger number (e.g., 3") is the High side. The register with the smaller number (e.g., 5/8") is the Low side.

Begin calibration of the devices
In order for your Flowie Os to provide accurate data, you must calibrate both devices.
Visit the calibration page to learn more.
Flowie O with Pulse Cable Install
Add sensor and see install instructions at: alertaq.com/addsensor
If you have purchased Professional Services to pre-register your sensor, skip to step 2.
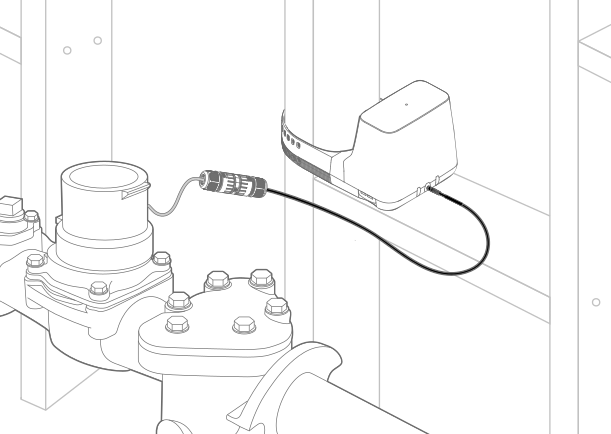
Ensure you have the correct cable
Check to see which type of meter you have. A Sensus Omni with a half lid will require a wall-powered pulse cable, while a full lid Sensus Omni needs a wall-powered cable. Contact support if you have neither.
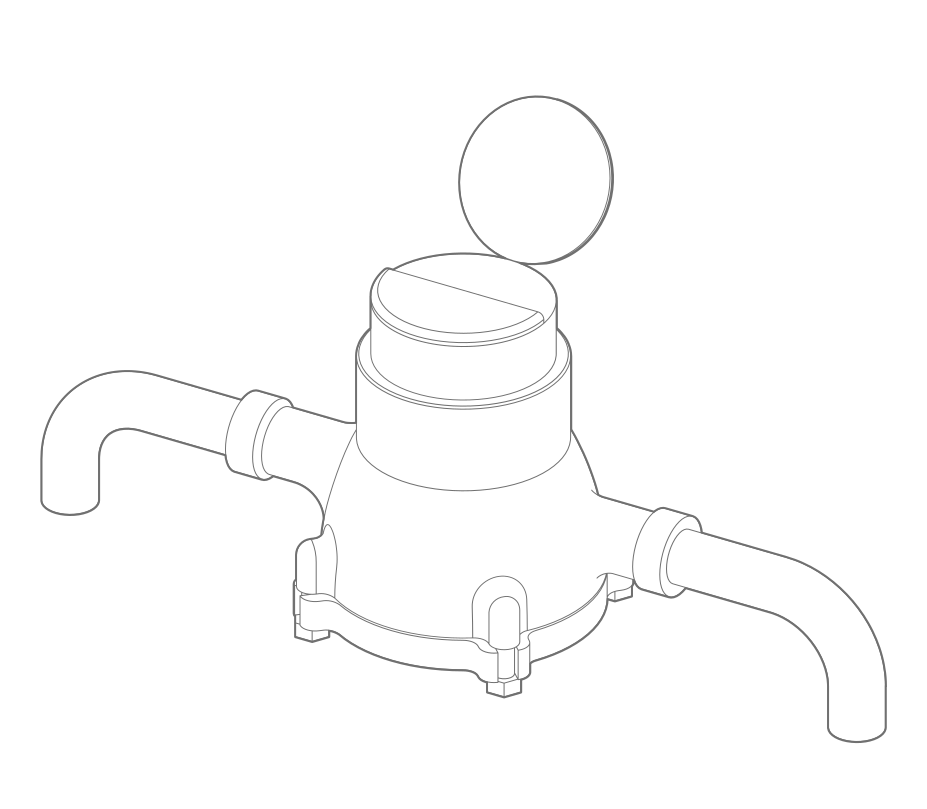
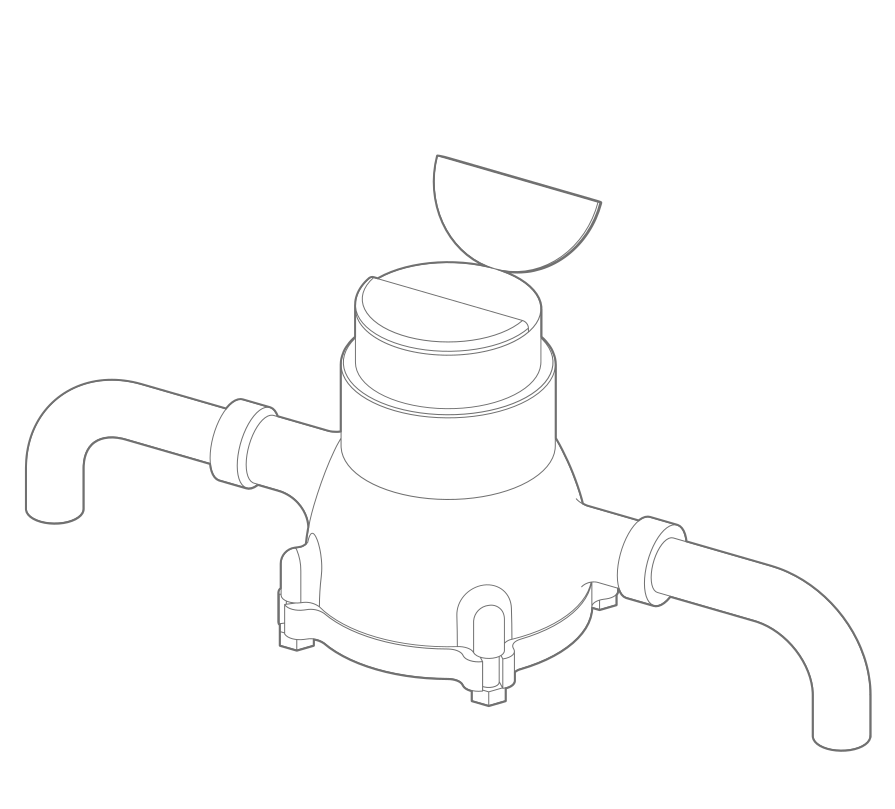
Open the Flowie O, insert the 2 D cell batteries and close the housing
Confirm the LED is green
See troubleshooting if it is not.
Find the white pulse output
On the OMNI™ meter, the pulseoutput cable is typically ~25 ft. long and is attached to the register.
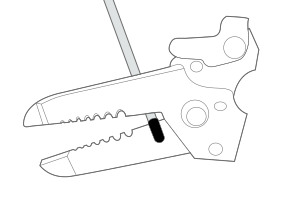
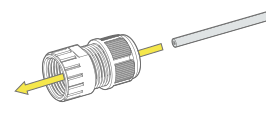
Push the pulse output cable through the Flowie O Pulse Cable connector
Push the exposed end of the white pulse output cable through the rubber seal towards the internal threads.
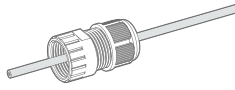
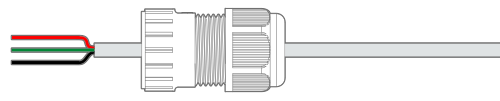
Strip the white insulation of the pulse output cable to expose the red, green, and black wires inside
Within the pulse output cable there are three smaller wires. Carefully, strip the white insulation so that you can see 1 inch of the 3 individual wires. After stripping the insulation of the pulse output cable, make sure that there are no cuts in the insulation of the red, green, and black wires.
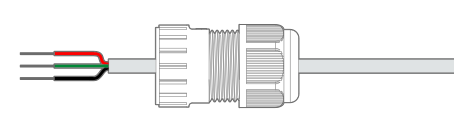
Strip the #24 red, green, and black wires
Strip each of the 3 wires to expose ~3/8 inch of wire.

Insert the 3 wires into the terminals and snap levers closed
Insert each wire, red-red, green-green, black-black, fully into the matching color terminal. When the wire is pushed fully to the bottom, close the terminal by flipping the levers upwards towards the wire.
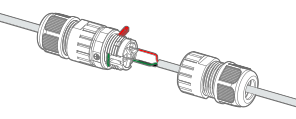
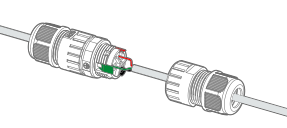

Verify that each wire is secured in the terminal
Tug on each wire to make sure it is secured by the lever.

Thread the connector closed
Thread the inner part tightly closed.
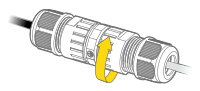

Insert the pulse cable into Flowie O
Remove the rubber plug covering the jack on Flowie O. Insert the pulse cable into the jack. Make sure that the pulse cable is inserted as far as possible in order to create a waterproof seal.
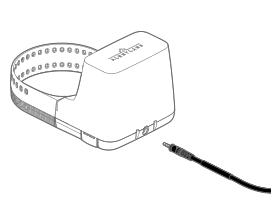

Check the LED
It should blink white for 3 seconds, meaning you're ready to proceed. If a blue light appears, or no light at all, unplug the cable for 10 seconds and try again. If the issue persists, contact support@alertlabs.com

Secure the Flowie O
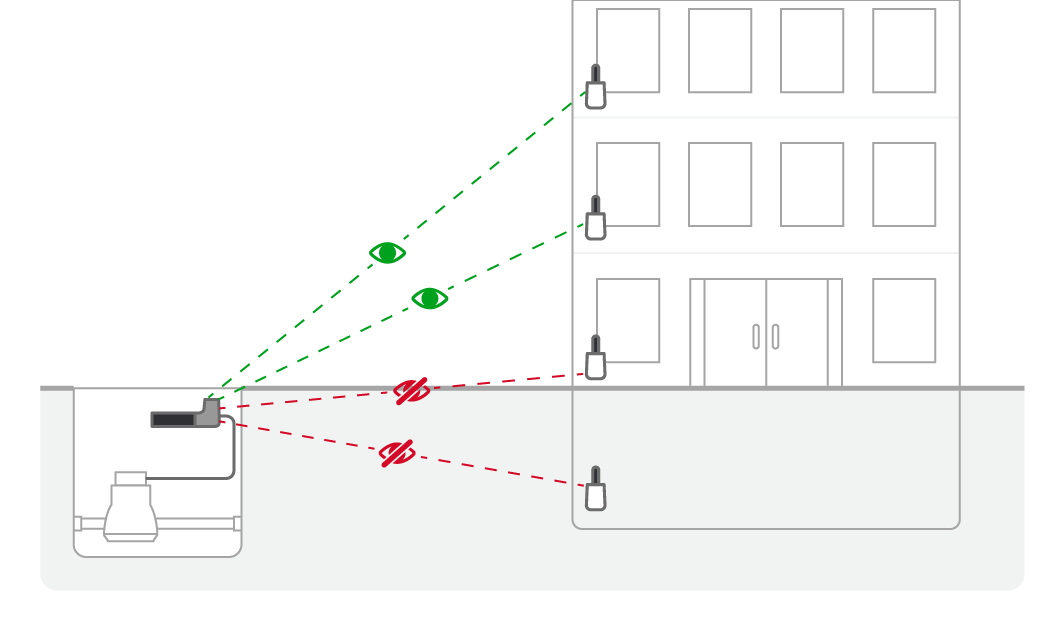
Use the strap to secure Flowie O in place. The Flowie O should be in a location where it won’t be moved and the cable won’t be at risk of being disconnected. If Flowie O is installed in a pit, it should be secured as high as possible to maximize the communication strength to the Sensor Relay and avoid being submerged.
Note: If there is a power supply on your cable, plug the power supply into a nearby outlet.

Upload a photo of the installation to the sensor details page in AlertAQ™
To get to the details section of the sensor, select the name of the sensor from the Sensors page. See help article.
If your sensors were not pre-registered, update the sensor name based on its installation.

Begin calibration of the device
In order for your Flowie O to provide accurate data, you must calibrate the device.
Visit the calibration page to learn more.
Flowie O with Extension Cable Install
Add sensor and see install instructions at: alertaq.com/addsensor
If you have purchased Professional Services to pre-register your sensor, skip to step 2.
If installing Flowie O in a pit...
Place Sensor Relay on the 2nd or 3rd floor of the building to ensure the strongest signal. If not, move to the next step
Open the Flowie O, insert the 2 D cell batteries and close the housing
Confirm the LED is green
See troubleshooting if it is not.
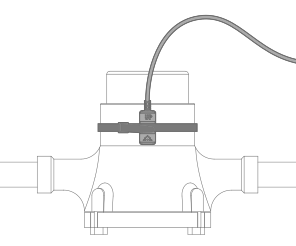
Secure Cable to the meter
Use a zip tie and place it as low on themeter as possible. The word 'up' should be visible and upright.
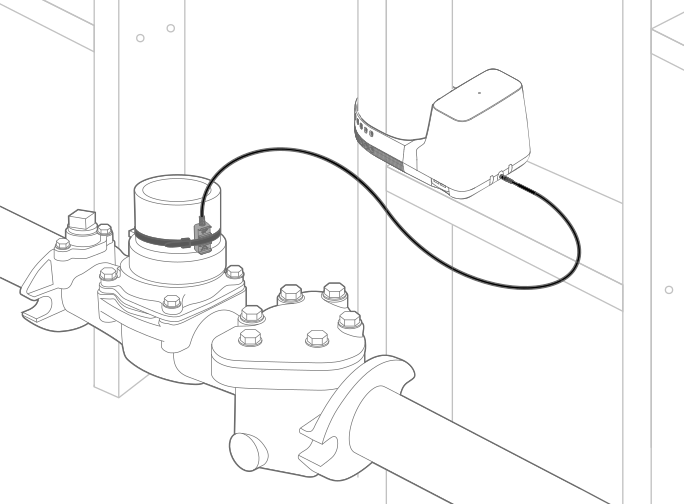
Connect the Cable
Remove the plug and insert the other end of the cable
Check the LED
It should blink blue for 3 seconds, meaning you're ready to proceed. If a white light appears, or no light at all, unplug the cable for 10 seconds and try again. If the issue persists, contact support@alertlabs.com
Secure Flowie O
Strap the device to a location where it won’t be moved. If installed in a pit, secure as high as possible.
Upload a photo of the installation to the sensor details page in AlertAQ™
To get to the details section of the sensor, select the name of the sensor from the Sensors page. See help article.
If your sensors were not pre-registered, update the sensor name based on its installation.
Begin calibration of the device
In order for your Flowie O to provide accurate data, you must calibrate the device.
Visit the calibration page to learn more.
