
.png)

Install Sensor Relay before any other sensor


Standard Install

Add sensor and see install instructions at: alertaq.com/addsensor
If you have purchased Professional Services to pre-register your sensor, skip to step 2.

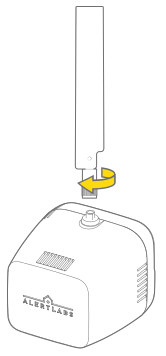
Screw on antenna

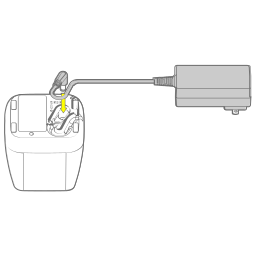
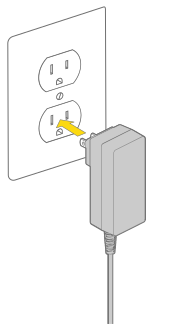
Plug in the sensor

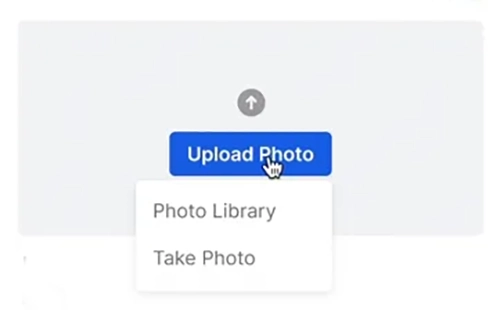
Confirm the Sensor Relay LED is green
See troubleshooting if it is not.
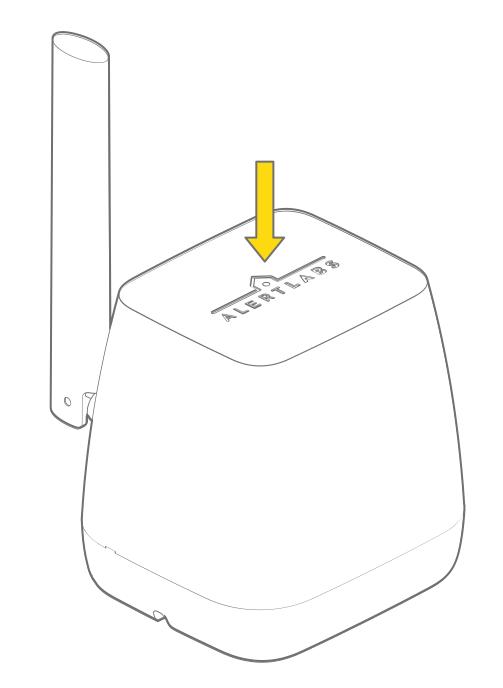
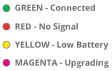

Upload a photo of the installation to the sensor details page in AlertAQ™
To get to the details section of the sensor, select the name of the sensor from the Sensors page. See help article.
If your sensors were not pre-registered, update the sensor name based on its installation.
Wall Mounted Install
Add sensor and see install instructions at: alertaq.com/addsensor
If you have purchased Professional Services to pre-register your sensor, skip to step 2.
Screw on antenna
Plug in the sensor
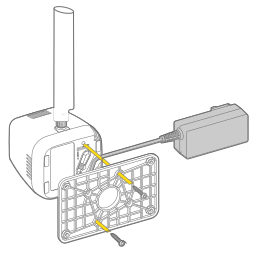
Screw mounting plate to bottom of sensor
Make sure the power adapter is plugged into the bottom of the Sensor Relay before you attach the mounting plate.
Choose the appropriate wall anchor and install
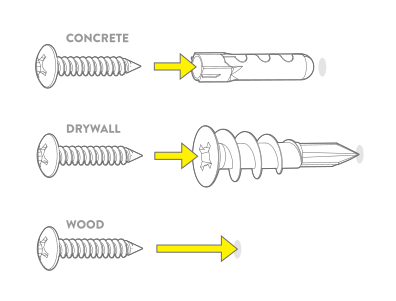

Screw plate and sensor into wall using the anchors
%20-%20Antenna%20V2.svg)

Confirm the Sensor Relay LED is green
See troubleshooting if it is not.

Upload a photo of the installation to the sensor details page in AlertAQ™
To get to the details section of the sensor, select the name of the sensor from the Sensors page. See help article.
If your sensors were not pre-registered, update the sensor name based on its installation.
Antenna Extension Cable Install
Add sensor and see install instructions at: alertaq.com/addsensor
If you have purchased Professional Services to pre-register your sensor, skip to step 2.
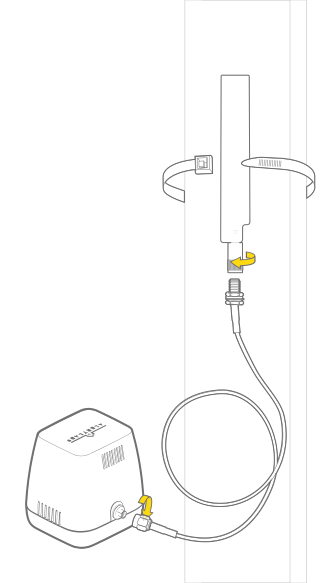
Attach cord to Sensor Relay
Screw the base of the cord to the antenna port, and the other end to the Antenna Extension Cable. Secure the antenna to a higher location.
Plug in the sensor
Confirm the Sensor Relay LED is green
See troubleshooting if it is not.
Upload a photo of the installation to the sensor details page in AlertAQ™
To get to the details section of the sensor, select the name of the sensor from the Sensors page. See help article.
If your sensors were not pre-registered, update the sensor name based on its installation.