
Floodie
Flood Sensor & Water Leak Detector

Standard Install

Add sensor and see install instructions at: alertaq.com/addsensor
If you have purchased Professional Services to pre-register your sensor, skip to step 2.

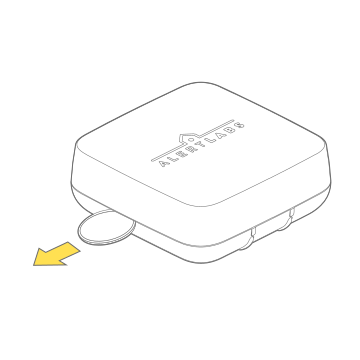
When ready to install, pull the tab to activate the batteries

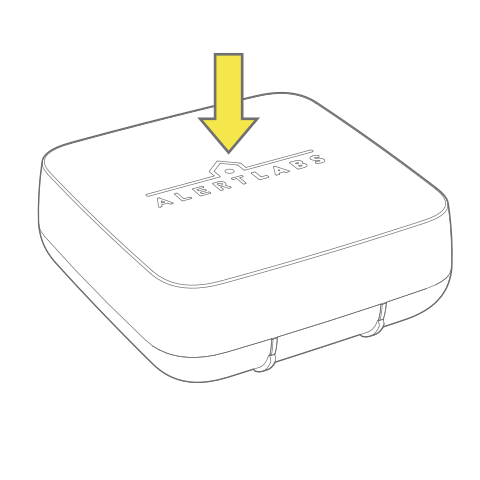
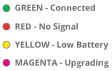
Confirm the LED is green
See troubleshooting if it is not.

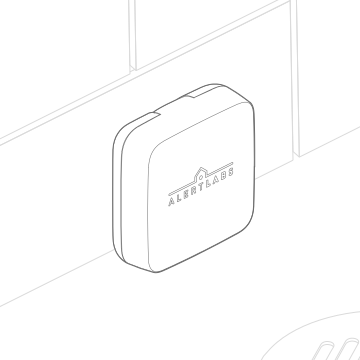
Place in the desired location within 500ft. (150 m) of the cellular sensor
Horizontally or vertically, but the metal contacts should be nearly touching the floor


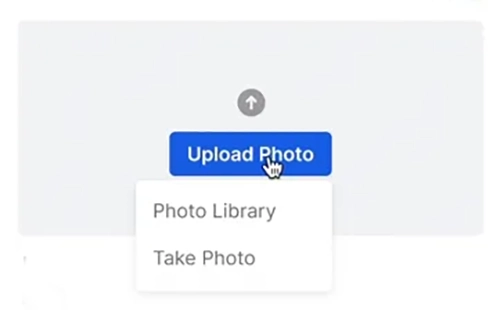
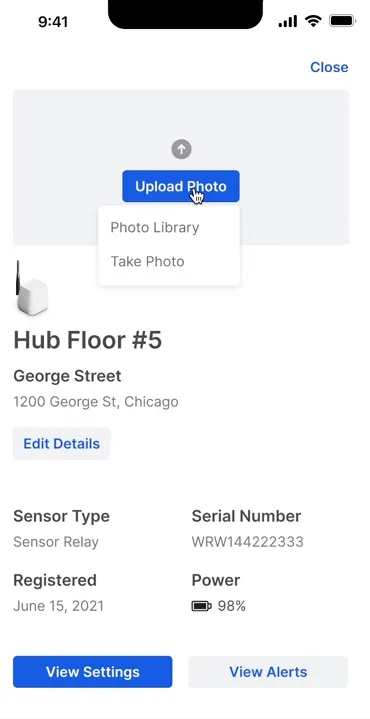
Upload a photo of the installation to the sensor details page in AlertAQ™
To get to the details section of the sensor, select the name of the sensor from the Sensors page. See help article.
If your sensors were not pre-registered, update the sensor name based on its installation.
Wall Mounted Install
Add sensor and see install instructions at: alertaq.com/addsensor
If you have purchased Professional Services to pre-register your sensor, skip to step 2.
When ready to install, pull the tab to activate the batteries
Confirm the LED is green
See troubleshooting if it is not.
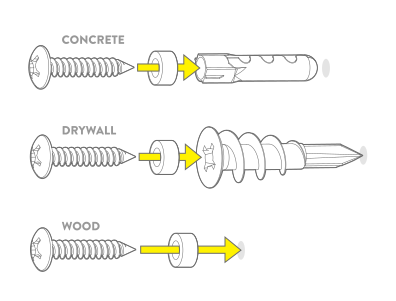
Choose and install the appropriate anchor
Partially insert the screws into the wall, leaving a small gap. Install near the floor, so the metal contacts on Floodie sit nearly flush with the floor once mounted.
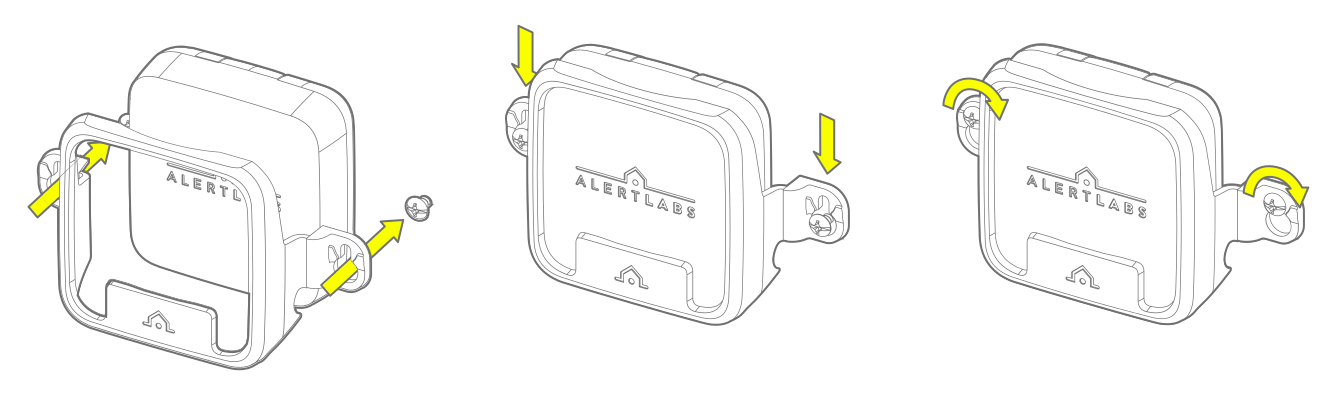
Place the sensor into the mounting bracket
The logo should be upright and visible. Fit the bracket's keyhole slots onto the screws' heads. Slide the bracket down and tighten the screws until snug.

Upload a photo of the installation to the sensor details page in AlertAQ™
To get to the details section of the sensor, select the name of the sensor from the Sensors page. See help article.
If your sensors were not pre-registered, update the sensor name based on its installation.
Flood Cable & Standard Install

Note: The metal contacts on Floodie are not active if the flood cable is plugged in.
Add sensor and see install instructions at: alertaq.com/addsensor
If you have purchased Professional Services to pre-register your sensor, skip to step 2.
When ready to install, pull the tab to activate the batteries
Confirm the LED is green
See troubleshooting if it is not.
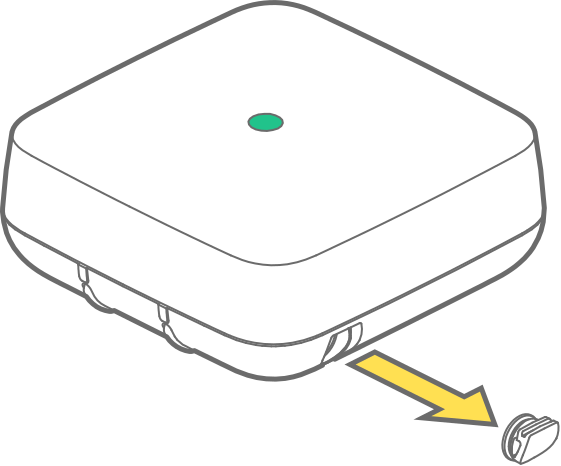
Pull out the rubber plug on the side of Floodie
Plug the cable into the accessory port
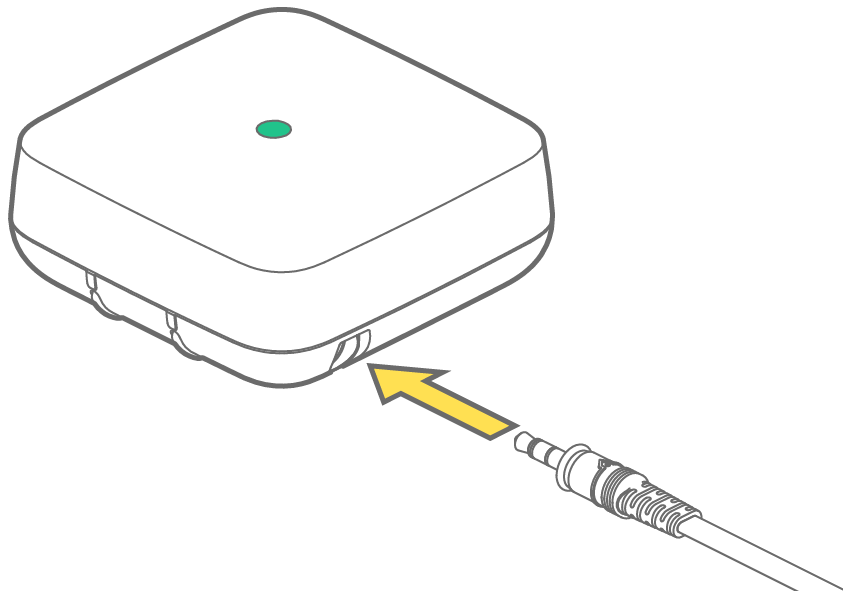
Twist the end of the accessory cable after inserting. This ensures a waterproof seal.
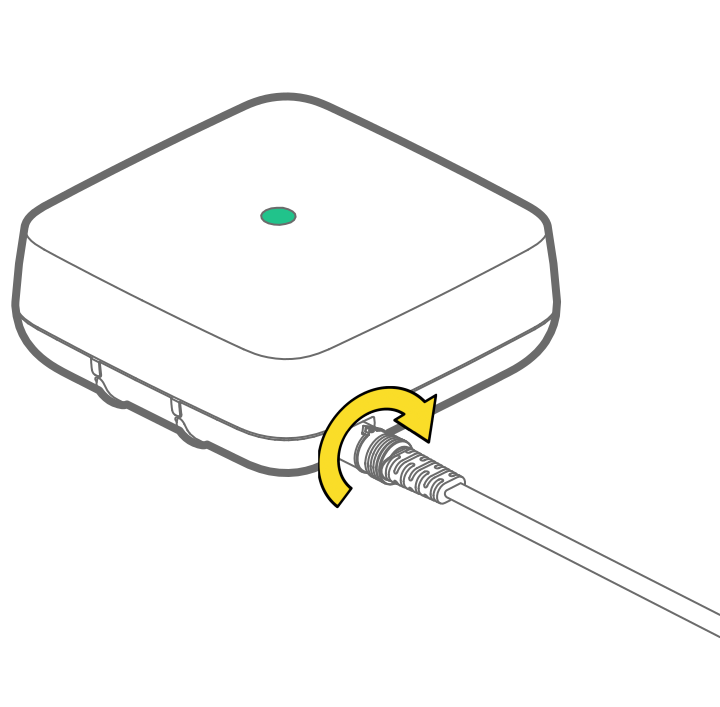

Check the LED is blue
.svg)
If the wrong color appears, or no lightat all, unplug the cable for 10 seconds and try again. If the issue persists, contact support@alertlabs.com

Lay the cable forming a perimeter around the area at risk for water damage
e.g., base of water heater tank.
Make sure Floodie is near enough to a wall to be mountable.
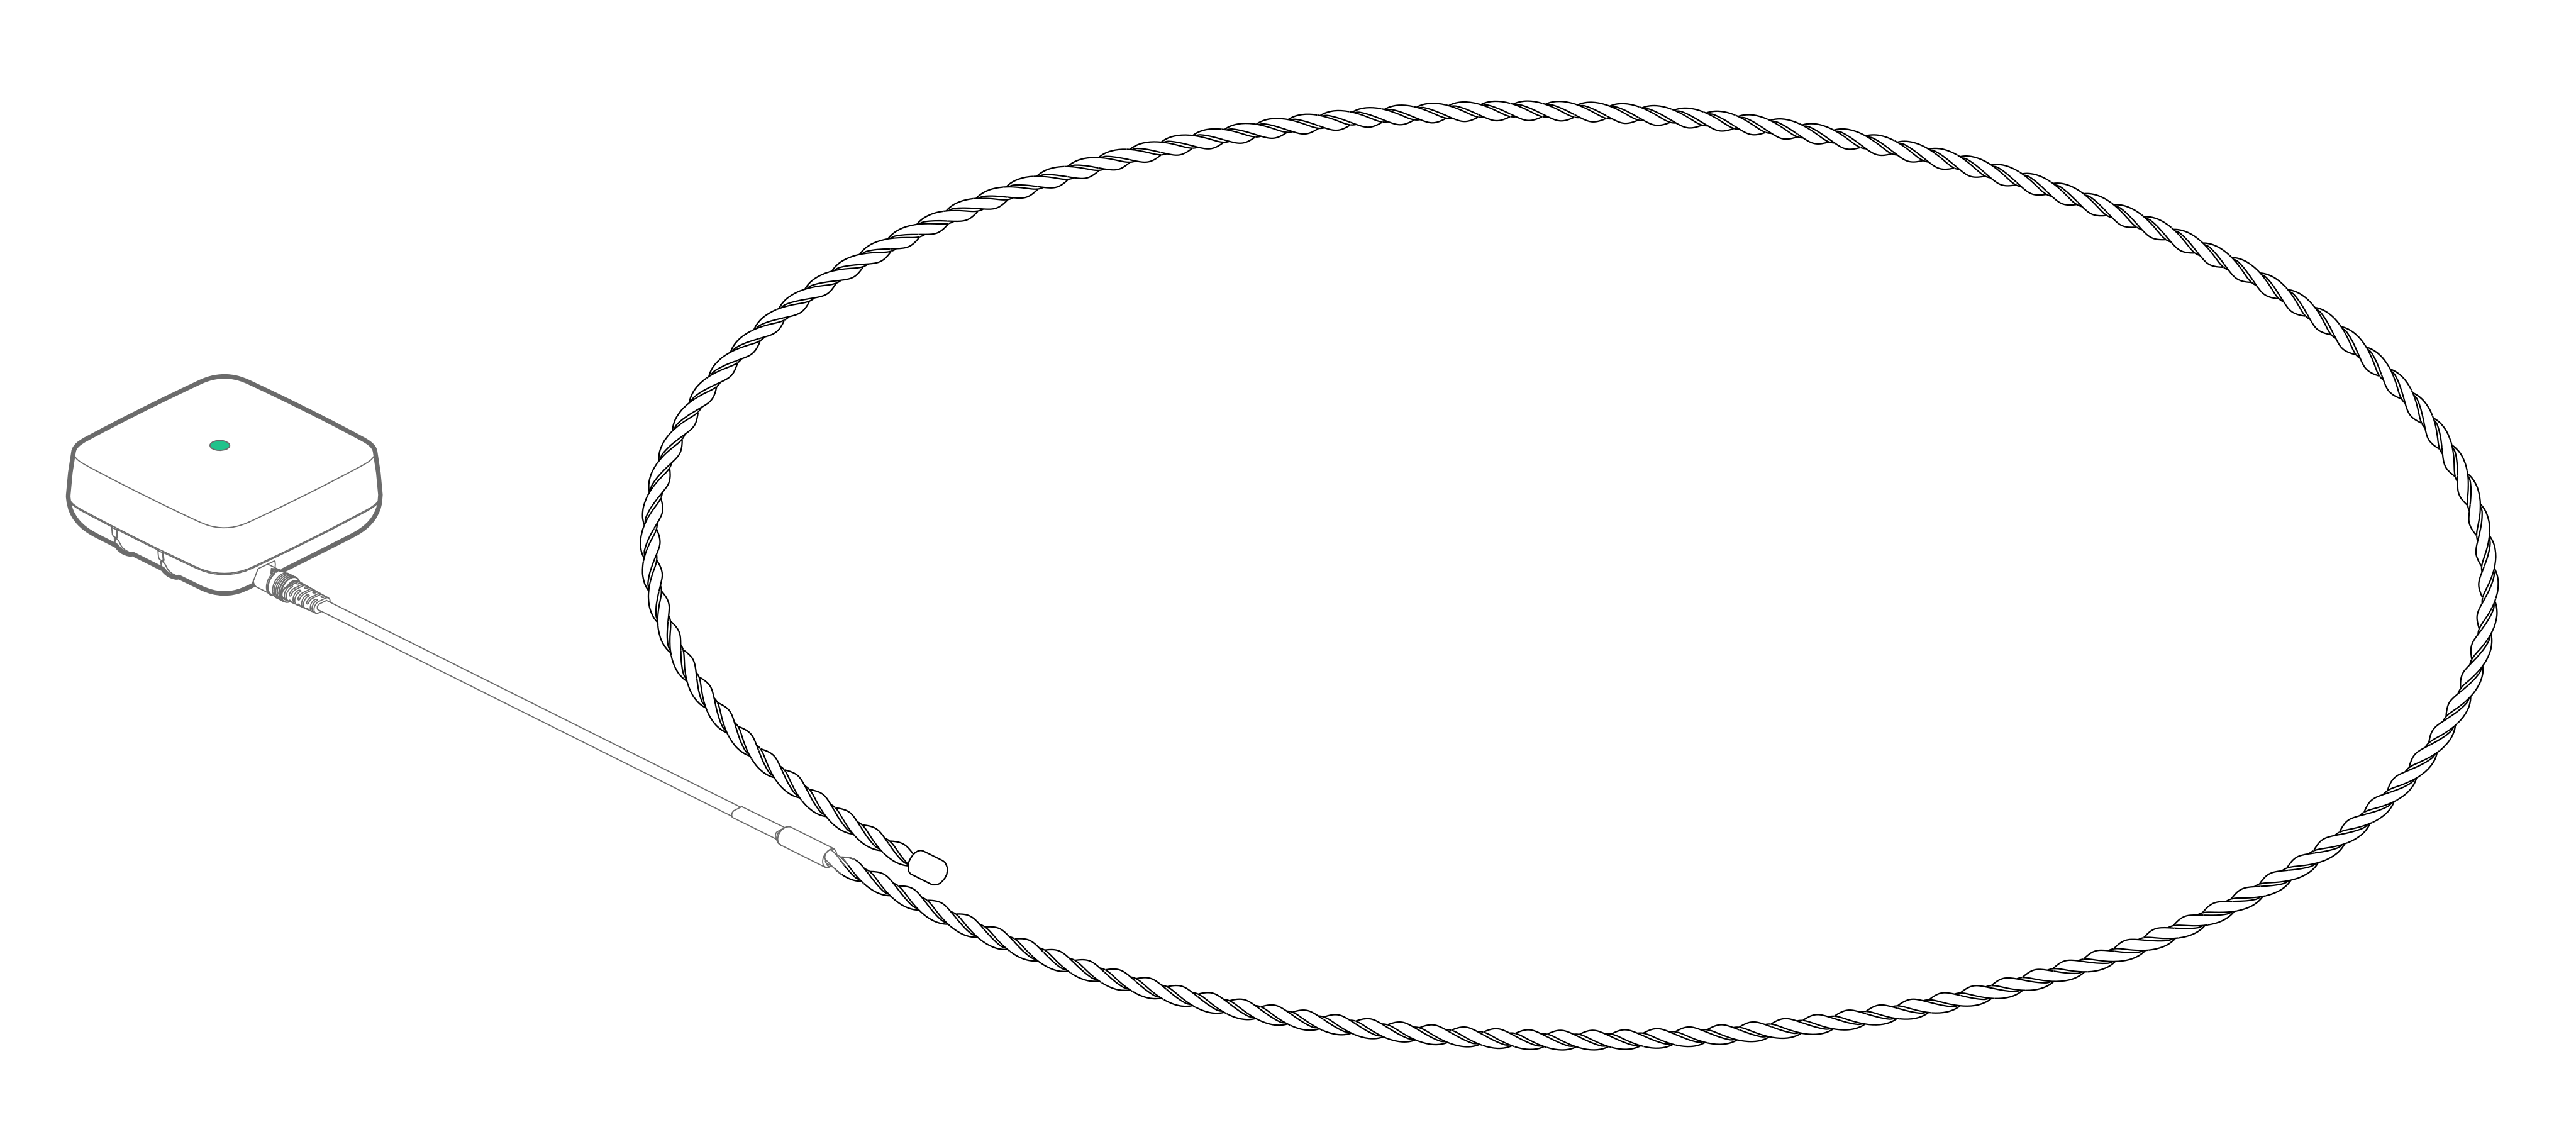

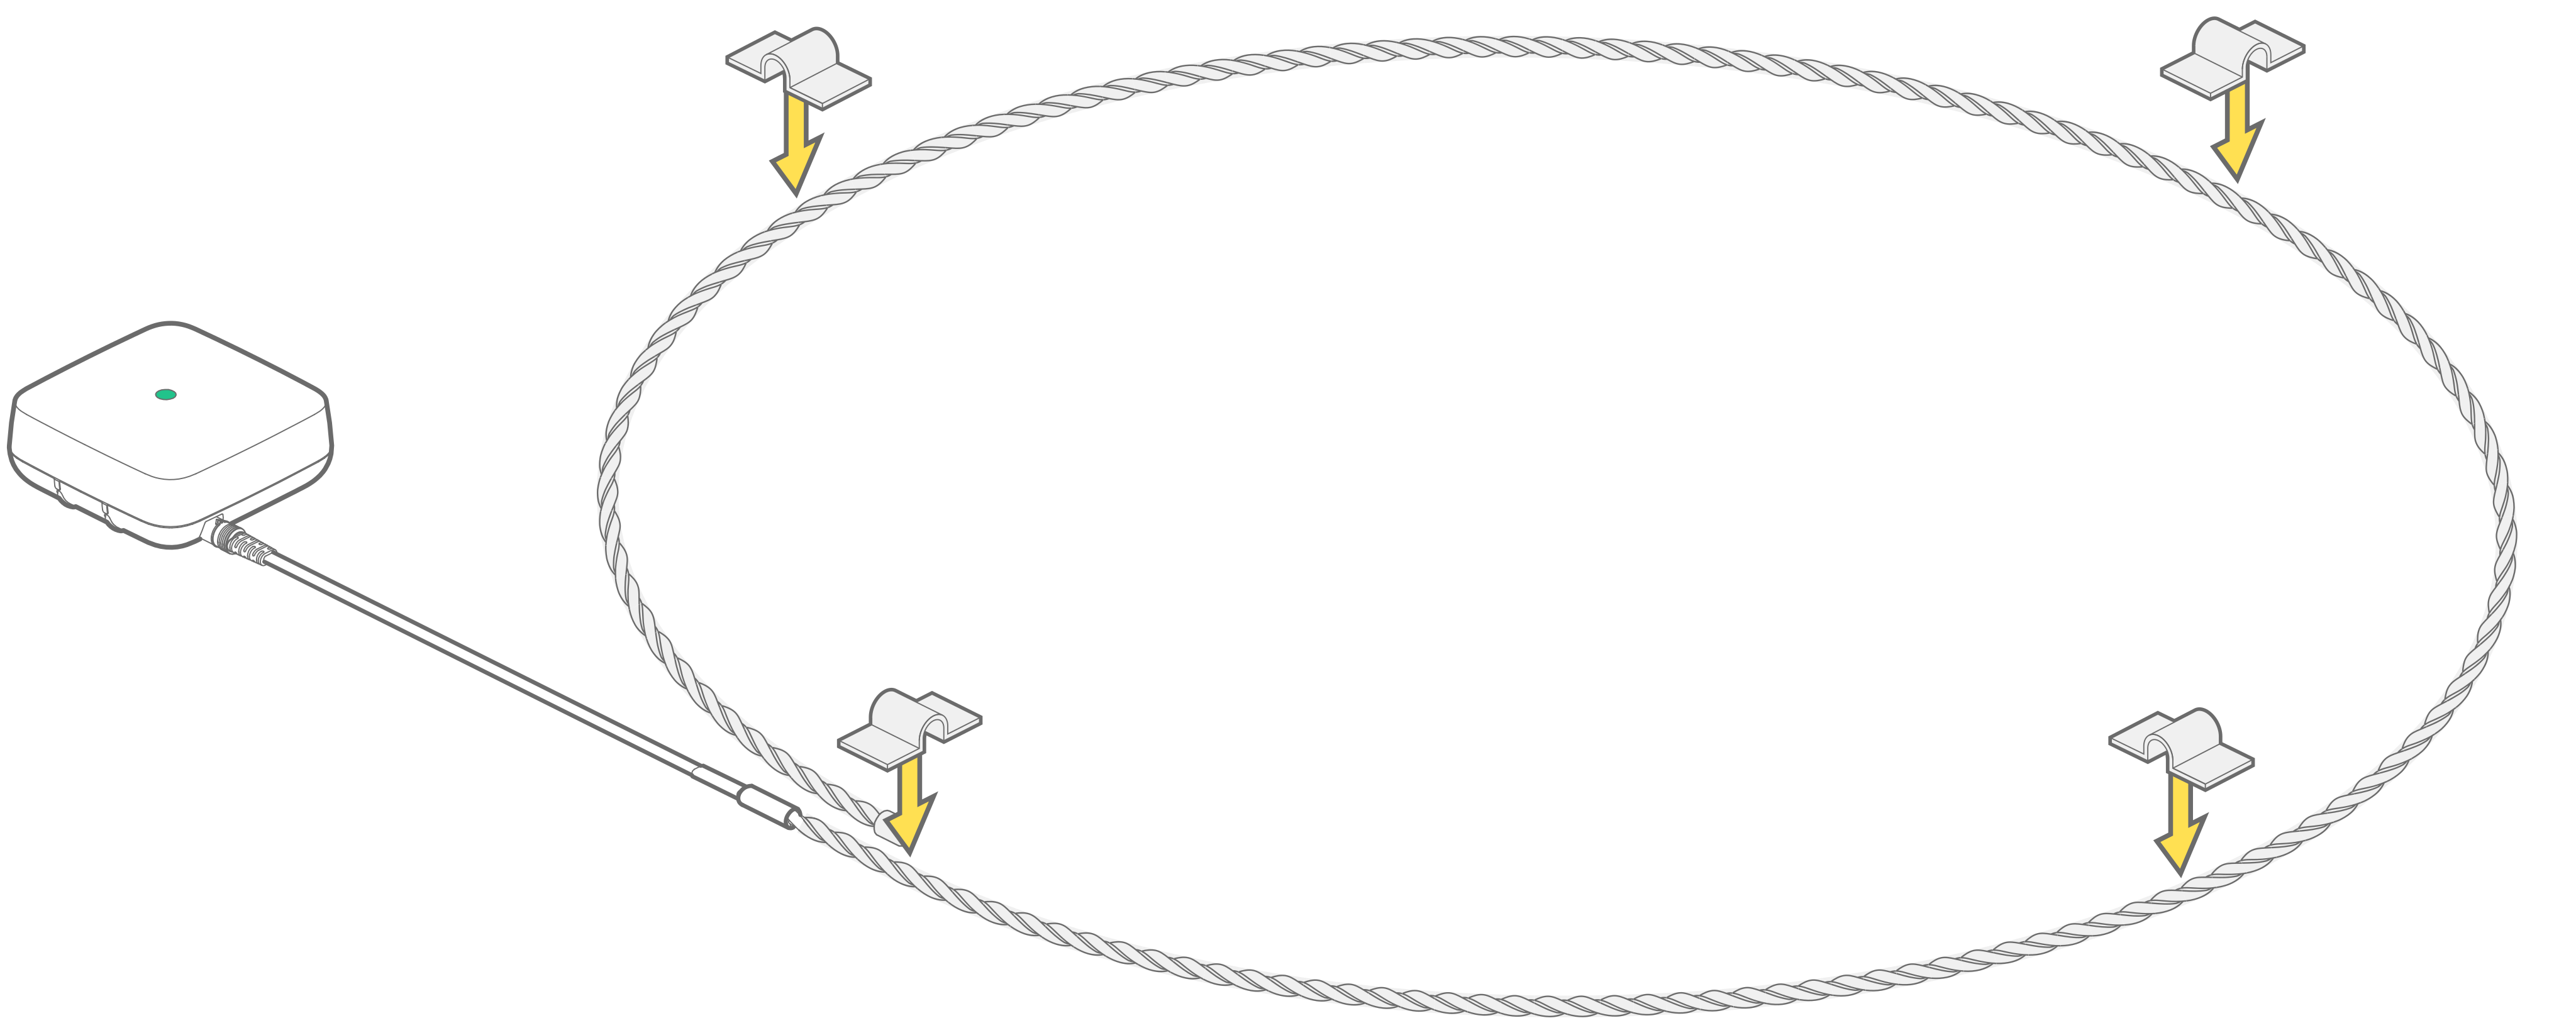
Secure to the floor (optional)
Use the cable holders (included) to secure the cable to the floor.

Upload a photo of the installation to the sensor details page in AlertAQ™
To get to the details section of the sensor, select the name of the sensor from the Sensors page. See help article.
If your sensors were not pre-registered, update the sensor name based on its installation.


Temperature Cable & Standard Install
Add sensor and see install instructions at: alertaq.com/addsensor
If you have purchased Professional Services to pre-register your sensor, skip to step 2.
When ready to install, pull the tab toactivate the batteries
Confirm the LED is green
See troubleshooting if it is not.
Pull out the rubber plug on the side of Floodie
Plug the cable into the accessory port
Twist the end of the accessory cable after inserting. This ensures a waterproof seal.
Check the LED is white
If the wrong color appears, or no light at all, unplug the cable for 10 seconds and try again. If the issue persists, contact support@alertlabs.com
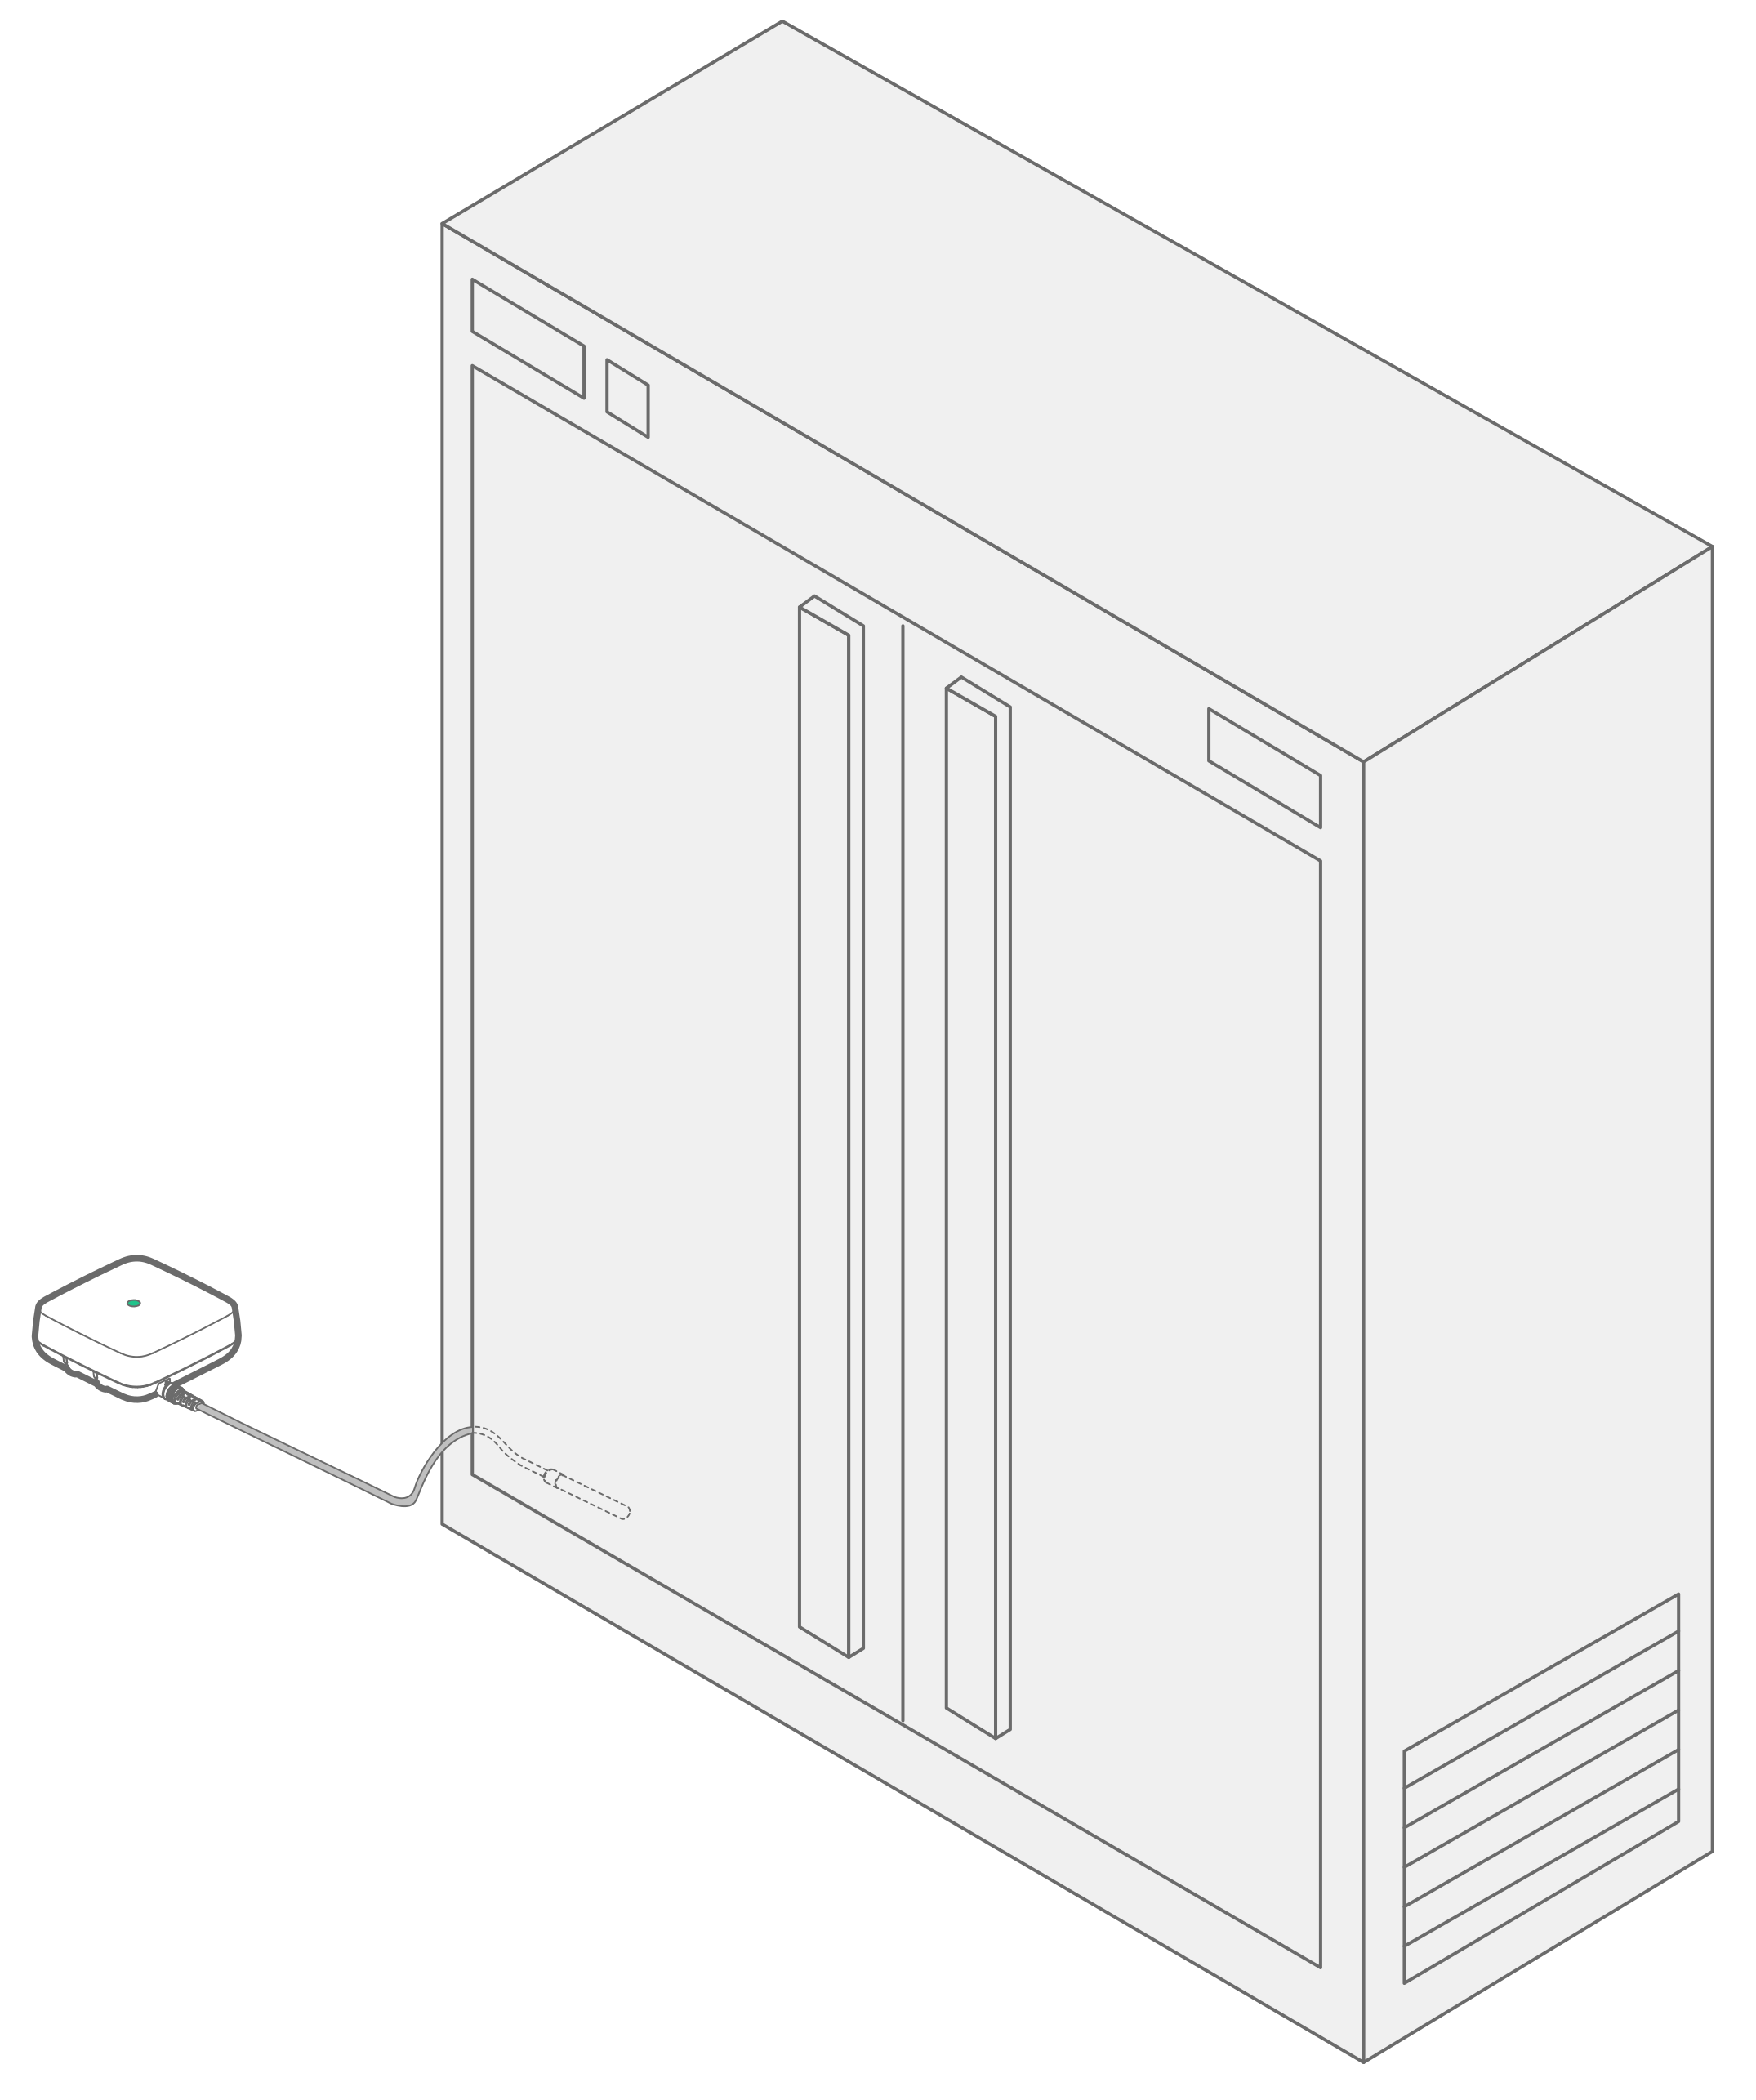
Place the probe end of the temperature cable in/on the area you would like to monitor
Upload a photo of the installation to the sensor details page in AlertAQ™
To get to the details section of the sensor, select the name of the sensor from the Sensors page. See help article.
If your sensors were not pre-registered, update the sensor name based on its installation.
Temperature Cable & Mounting Bracket
Add sensor and see install instructions at: alertaq.com/addsensor
If you have purchased Professional Services to pre-register your sensor, skip to step 2.
When ready to install, pull the tab toactivate the batteries
Confirm the LED is green
See troubleshooting if it is not.
Pull out rubber plug on the side of Floodie
Plug the cable into the accessory port
Twist the end of the accessory cable after inserting. This ensures a waterproof seal.
Check the LED is white
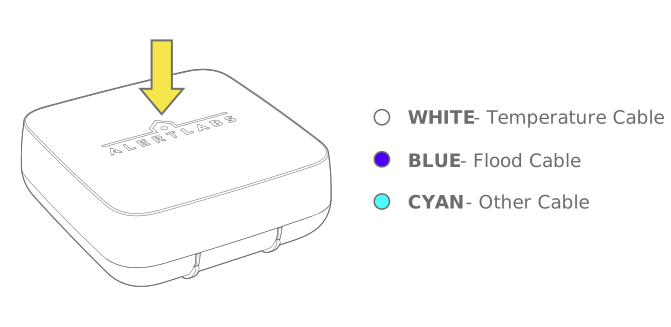
If the wrong color appears, or no light at all, unplug the cable for ten seconds and try again. If the issue persists, contact support@alertlabs.com
Choose and install the appropriate anchor
Partially insert the screws into the wall, leaving a small gap. Install near the floor, so the metal contacts on Floodie sit nearly flush with the floor once mounted.
Place the sensor into the mounting bracket
The logo should be upright and visible. Fit the bracket's keyhole slots onto the screws' heads. Slide the bracket down and tighten the screws until snug.
Place the probe end of the temperature cable in/on the area you would like to monitor
Upload a photo of the installation to the sensor details page in AlertAQ™
To get to the details section of the sensor, select the name of the sensor from the Sensors page. See help article.
If your sensors were not pre-registered, update the sensor name based on its installation.
